Day 1:
Today was the first day of teaching our clay
slab box lesson, and to be honest, it was a little rough simply because I was
unsure what exactly to expect. To begin
the lesson, we introduced the students to the assignment with a Microsoft
PowerPoint presentation and we tried to actively engage students by asking
students about their prior knowledge of working with slab. Unfortunately, many of the students were
unwilling to answer questions that were asked of them and only a select few
would answer questions, which is counterproductive of an engaged classroom
dialogue, which was our original intent.
For students to gain some inspiration, we included examples of slab
boxes made by artists. We then asked
students to compare and contrast the examples and talk about why one included
organic forms and the other included geometric forms, and vice versa. Students were then given the grading rubric
and we went over each of the criteria and how to achieve the best possible
grade.
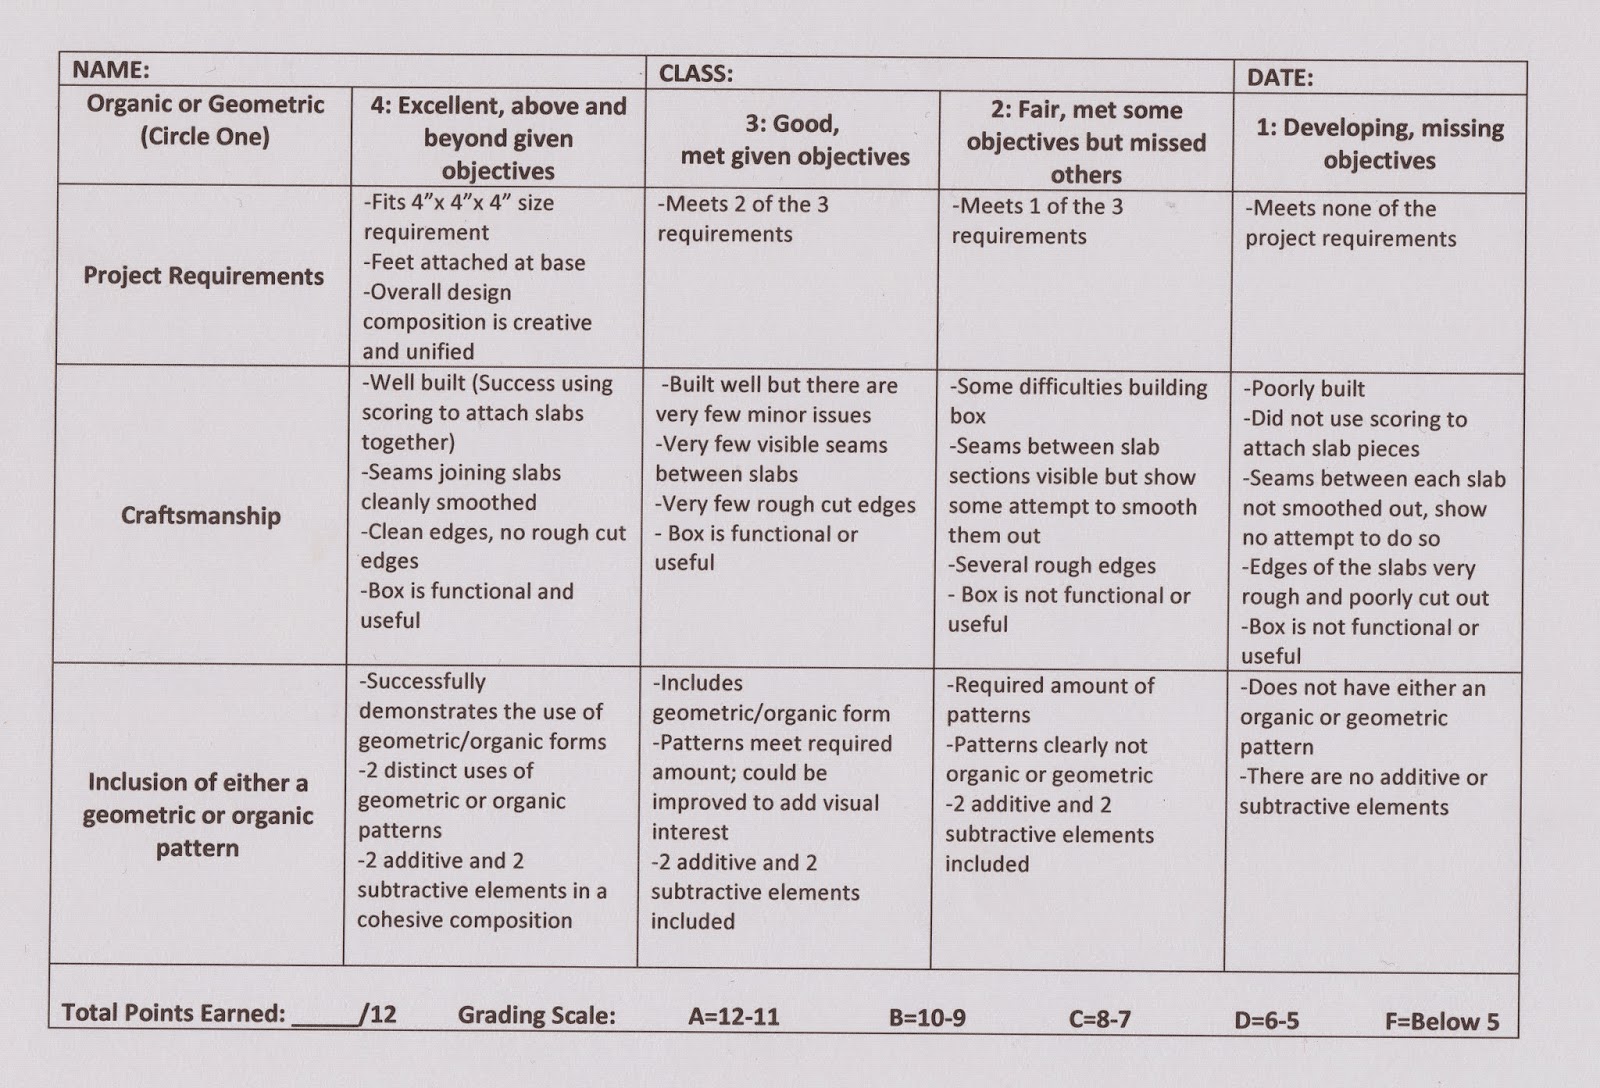
*This is a copy of the grading rubric that was given to the students*
After the introduction, the students were given a
demonstration on how to construct their slab pieces and students were given a
template of the square pieces needed, for time’s sake. Students soon got to work to cut out their
slab squares and before we knew it, the class period was over. After the students cleaned up and left, our
cooperating teacher went over what we did with us and gave us a lot of
constructive criticism. I was honestly
very worried at what our cooperating teacher was going to say, but after hearing
her input, it put me at ease.


*The three pictures above are of our cooperating teacher's of the first day of our lesson*
Day 2:
Today ran a little more smoothly now that we
had an idea of what to anticipate because of the information that our
cooperating teacher gave us from the previous day. Before the students began working on their boxes,
my practicum partner gave the students a demonstration on how to cut the lid to
their box off of the hollow cube. After
the lid was cut off, she demonstrated how to create a flange on the inside of
the lid. A flange is a protruding edge that
can be used to strengthen an object, which in this case, the lid, as well as
having the ability to keep the lid placed on the box. Putting a flange on a clay form was a new
concept that the students needed to learn, so we made sure to thoroughly
explain it and demonstrate it to the students.
After the demonstration, the students set to work on their
clay boxes. During this time, Emma and I
went around the class and helped students with any technical issues. We also took advantage of this time by asking
students what they have learned so far as we were helping students. We used this information as an informal
assessment in order to determine what information needs to be touched on.
Day 3:
Today we had students continue working on
their clay boxes and perhaps the most serious issue that students are coming
across is that they are not letting their clay slabs dry enough to become
leather hard. Because of this, when they
attach their slabs together to make the cube form, the walls are having difficulties
supporting the weight and are bulging outwards.
Another issue some students are having is that despite my partner
telling students several times throughout the course of our lesson, they are
not properly covering their clay slabs and the slabs have tried out too much in
order to be leather hard. In order to
attach the slabs to each other using scoring and slip, the slabs need to be in
the leather hard stage. Because of these
difficulties the students are having, we gave the students an extension in
order to complete the projects successfully and correctly. There were some students who were having
success with building the cube form and in many cases helped their friends who
were having issues.
Halfway through the class period, we had the students gather
around the table to give a demonstration on how to apply additive and
subtractive textures to the surface of their boxes, in which I applied a clay
shape resembling an ocean wave, which was my additive piece. I then added more texture by carving out
curves on the wave, which gave the piece a sense of movement while also being a
subtractive quality. After demonstrating
the additive and subtractive processes, I demonstrated how to attach the feet
we had students make the day before using scoring and slip. I made sure that the students remembered the
information I was giving them by asking them what I had done previously. The students confidently answered the
questions I asked of them and after asking if there were any further questions,
I dismissed the students and they went back to working on their boxes.
Unfortunately because of the technical issues that the
students were facing with their slab pieces, my partner and I decided to extent
the lesson and gave the students more time to complete the assignment.
No comments:
Post a Comment